Saturday, July 12, 2014

Glitter Brush Holder, Necklaces, and Animal Keychains: This Week in Crafts

I've been up to a whole bunch of crafts lately.

The first was this glitter makeup brush holder, which I love:


This was made using Mod Podge, fine glitter, and painter's tape. The Mason jar was $2, and I purchased the ribbon on a roll for around $3.

If you're interested in making the same thing, put on a thick coat of Mod Podge, pour the glitter over it, and add a thin layer of Mod Podge on top to let it settle. Don't peel off the painter's tape until the next day, when the Mod Podge has thouroughly dried, or the edge will become messy and inconsistent.

Next, I made this necklace out of a simple wood carving I found at Michael's. They were selling several of these necklaces, unpainted, in bird, butterfly, and feather shapes, for $2 each. I bought four, and plan to give them away as gifts in my pay-it-forward challenge. All I had to do for this was paint it.


Last, I made these cute animal key chains using some small plastic North American animals, and a few screw hooks. Easy-peasy, and nice for attaching to loose guest keys, for example.


There you have it! A week in simple crafts.

Sunday, June 22, 2014

DIY - Decoupage Mason Jars & Flower Arrangement

The idea for this craft came to me when I was wandering the aisles of my local craft store. It's based on a activity my mom did with me when I was little, and I would say the decoupage portion is still super kid-friendly! The main part of this activity is tearing tissue paper and basic decoupage, a.k.a. "gluing things messily with a paintbrush" - a great craft for kids with a lot of enthusiasm and not too many fine motor skills. (;

The ribbons and flower arranging are better-suited for an adult, so this is a perfect mommy-and-me craft. It would be a cute gift for grandparents or other family members, and could also make for adorable centerpieces at a DIY wedding.

Skill level: Very easy!
Age: Decoupage: 5+ with supervision; flower arrangement: 15+.
Cost: For me, $9 excluding reused materials.
Time: 45 minutes to an hour for decoupage; 30 minutes for flower arrangement.
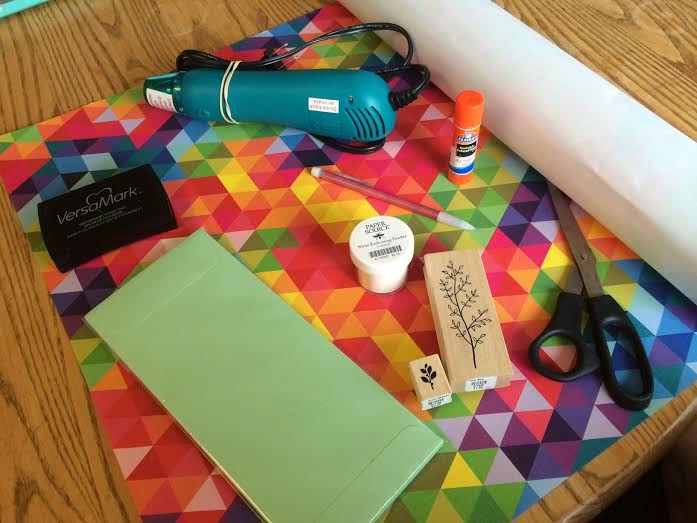

Supplies:
Silk flowers - I got these on sale for $5 at Michael's. I bought them in a set, but feel free to experiment with different flowers and colors!
Mason jar - $2.
Foam brush - 1" works best for this, but any will do! I bought this one for $0.49 at Michael's a few weeks ago.
Mod Podge - This super-popular decoupage glue can run a bit expensive (about $7 for an 8oz jar), so in a bind, you can mix kid's craft glue (e.g. Elmer's) and water at a 1-to-1 ratio instead. Just make sure it has a gluey, not watery, consistency!
Tissue paper -  I tend to have tissue paper lying around for my Etsy shop, but if you don't have any, you can buy a big package for about $5 at your local craft store.
Flower foam - Buy the size that will fit in your Mason jar; I got a pack of two for $3.50!

Step 1: Preparing the jar
The first thing I did was fit the flower foam in the mason jar before it became sticky with glue. As the mouth of the jar was slightly narrower than the jar itself, I had to shave my foam down a little by hand - luckily, that's easy to do with a little rubbing! It's okay if the foam is a little loose in the jar; the flowers will fill the space and hold it in place later.

Step 2: Tear the tissue paper into small pieces
This part is fun for kids! Rip the tissue paper into lots of pieces of different sizes. It's fun to use many different colors, and don't be afraid to be messy; the more random the size and shape of the pieces, the more cool and interesting the jar will look later.

Step 3: Decoupage
It may sound daunting, but this step is super easy! Using the foam brush, spread some glue over a section of the jar.
Add the tissue paper pieces on, and tap them down with your finger. Don't be afraid to let them overlap! Start with the larger pieces, and use the smaller pieces to layer over them later.

After you "tap" the pieces down with your finger, dip the foam brush in the Mod Podge (or decoupage glue) and run it over the tissue paper again. This will glue them down and allow you to layer new pieces on top. Add more layers of tissue paper and repeat these steps for the whole jar until you're happy with the look!
Yep, that's my momma in the background!

Step 4: Flower arranging
Using a wire cutter, cut the stems from their bundles with about 3-4" of stem remaining per flower. Stick these stems into the foam.
Experiment with the height of and angle of the flowers, with those in the middle sticking up slightly higher than those along the edges.
Tah-dah! Time for extras!
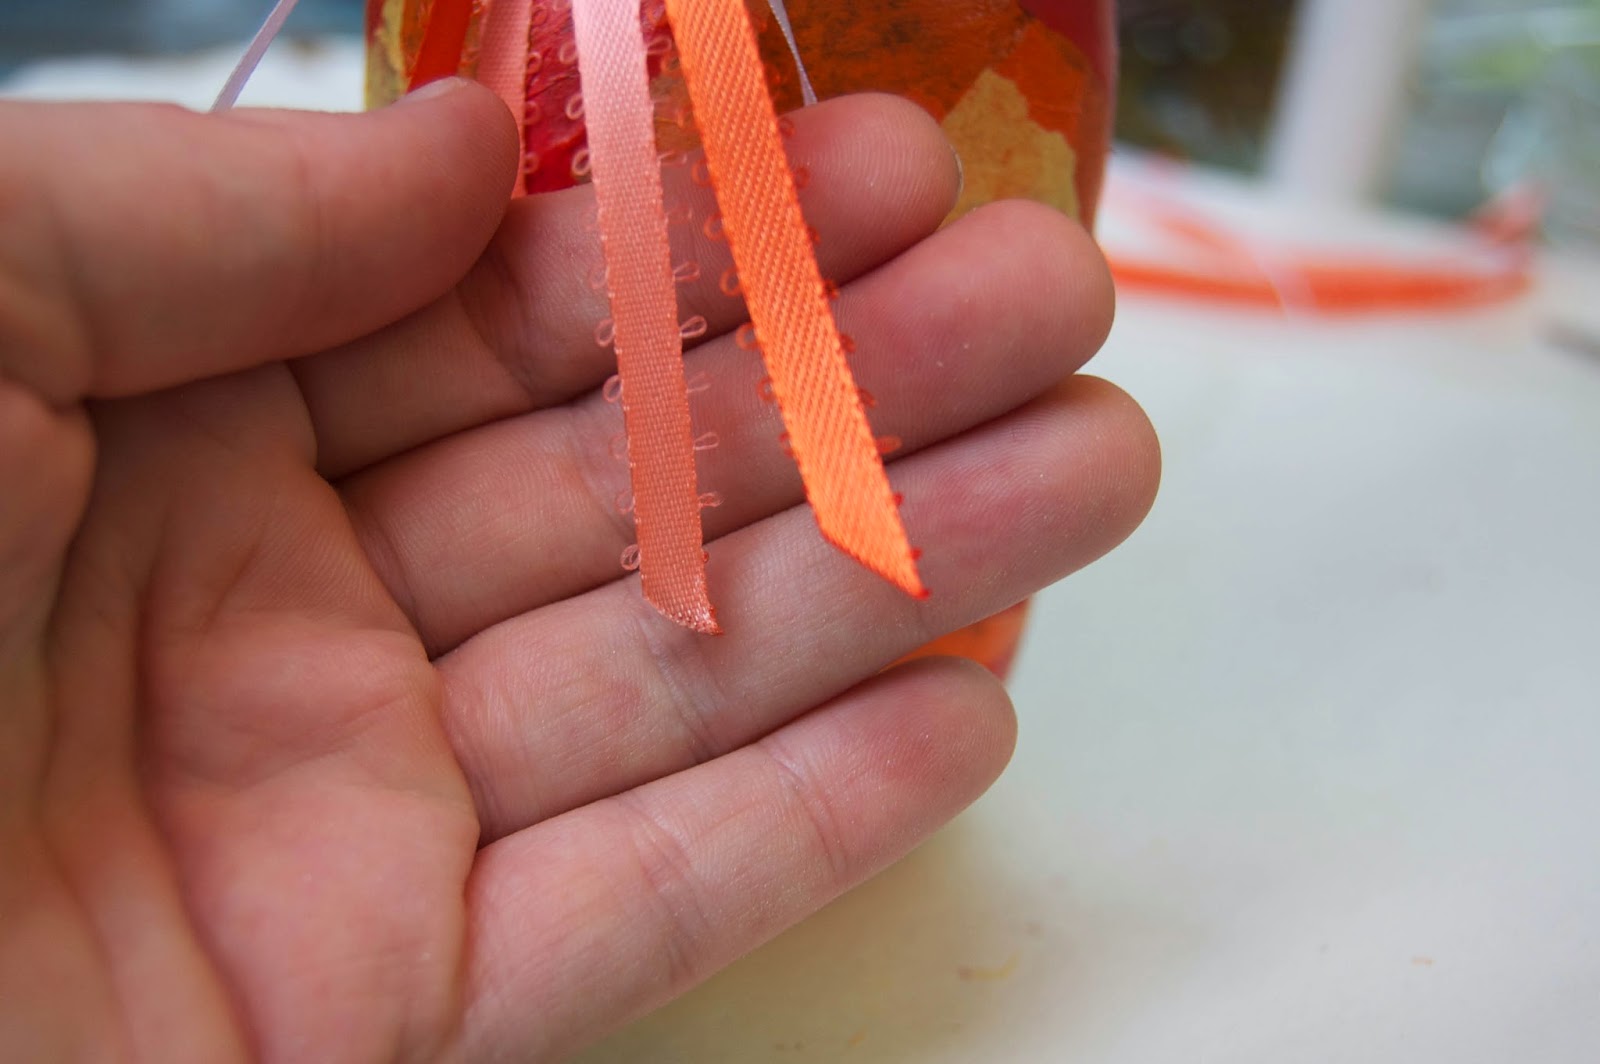
Step 5: Ribbon trim
For the final step, I used some extra ribbon in coordinating colors to tie around the mouth of the jar. Using a match or lighter, you can hem the ribbon's edges so they don't fray later.

And there you have it! A fun, easy craft that's kid-friendly and makes for a great gift or DIY home decor (especially for broke college students like me).

Thanks for stopping by, and don't forget to pin, reblog, and share if you like it!

Saturday, April 26, 2014

How to: Colorful Heat-Embossed Envelopes

Hey all,

My school year is winding down and I am sad to say goodbye to my school and RA friends. When I was in high school, I would sometimes write letters to my friends at the end of the year, and I decided to do that this year as well, since I'll be abroad for all of my junior year.

Rather than just printing out the letters and putting them in plain envelopes, I thought it might be fun to create special envelopes with little details that will make the letters for of a keep-sake. Here's the finished product:

 Sea foam green envelopes with rainbow insides and white heat-embossed detail.

And here's the tutorial. In essence, these are just envelopes with a few special details, so I'm going to show you the two techniques I used and I hope that you can use the skills to decorate your own items or envelopes how ever you like.

What I used:

Envelopes ($): Set of 10 sea foam green envelopes with side opening; Paper Source, $6
For colored insides ($):
  • Colorful wrapping paper (Paper Source, $2.25)
  • Scissors for cutting
  • Pencil for tracing
  • Glue stick for (surprise!) gluing
For heat embossing ($$$):
  • Stamps of your choice (prices vary).
  • Heat embossing powder in the color of your choice (a jar runs $4-6.50, and can be used many, many times over; I have a red jar that I use for name tags, Kabloem box embossing, and projects like this, and after 10 months I have only used up about 25% of the jar).
  • A watermark stamp pad ($6).
  • An embossing heating tool. I'm conflicted about these; the are quite expensive (about $28) and I feel that there must be a cheaper alternative. A blow drier won't work, because the rush of air would disperse the embossing powder and destroy the design, but I wonder if using a gas match lighter (one of those hand-held lighters with a long nose that people use for lighting stoves, candles, fireplaces, etc) and hovering it about the powder would do the trick. I haven't tried this, but I will do so and get back to you.
Colored insides
Trace the outline of the envelope on the reverse side of the wrapping paper, so you can see the pencil line clearly. For side-flap envelopes, trace only the clap and about an inch or so down; the recipient will only see the inside flap and a little inwards. For standard mailing envelopes (with a top flap), trace the whole shape of the open envelope, as the recipient will see the whole inside of the envelope.


Remove the envelope from the paper and sketch about a half centimeter inwards of the traced line (if you want more of the envelope to show, do a centimeter or more).


Cut out your insert. Slip it into the envelope to see how it looks and adjust as needed.


Trace your insert for as many envelope flaps as you need (I needed a total of ten).

Again, this is the back side of the paper.

Cut them out.

So cheery!

Run a glue stick over the white (back) side of the inserts, slip them into your envelopes, and press down across the whole thing for a few seconds so it sticks. Fold the flap of the envelope down so that the insert is also folded in the appropriate place.

Voila!

Heat embossing details
I didn't take many pictures of this process, because it is easier to explain in video. Nevertheless, I will do my best to explain it in writing, and link a video below so you can see how it works in action.


Take the stamp you are using and press it into the VersaMark (watermark) pad. Don't use traditional colored ink, as this dries quickly and will not be sticky enough to hold the embossing powder for later.

Press your stamp onto the area of paper you want to emboss; in this case, for me, the bottom front of the envelope, and a small detail on the flap. The ink is "invisible," but you will see a fresh, wet mark in the shape of your stamp where you pressed it down.

Place your envelope over a sheet of paper. The paper will catch excess embossing powder. Pour your embossing powder over the areas you want to heat emboss; there should be lots of excess, as you want to reach every corner of the design. pick up your area and tap it on the paper so the excess falls away. Blow or rub away any extra little areas. The powder will cling to your design. You can fold the paper with the excess powder and funnel it back into your powder jar.

Next, turn the heating tool on and hover it over the powder. After about ten seconds, the powder will melt and become smooth and shiny. Run the heating tool over the entire stamped area to melt the whole design into place (when I say melt, I want to clarify that this won't get messy; the design will stay perfectly in place and will have clean edges). The embossed area will be cool to touch and will not wear away over time. It should be a perfect impression of your stamp!

Here is a good video showing you the technique, for visual learners like me. She uses an anti-cling pad to wipe down the paper first; I don't have one, and I don't think it's necessary unless you are a serious perfectionist.


And voila! The finished product!


Wednesday, March 26, 2014

My first sweater! (January 2014)

Ken and I have been together for almost two years now (our anniversary is later this week), and as Gifts is one of our shared love languages, we've been giving each other handmade tokens of affection since we started dating. Last year, one of my New Years Resolutions was to knit a sweater, and as Ken is one of the thinnest humans on earth, making one for him seemed a little more efficient (and less expensive) than making one for myself. Here, after 3 months of on-and-off knitting, is the final product:

Pajama pants also made by me, and to be saved for a later post

Ken wanted the color and design of the sweater to be a surprise, and I am absolutely terrible at surprises. One of my only condolences was constantly taking pictures of my progress on Photobooth. Here you can see the sweater develop, kind of like those month-by-month pregnancy photo series:


 This immensely flattering photo was taken when I had pneumonia.


I didn't finish the sweater before New Year's, 2014, but I still consider it a success, though there was one somewhat fatal flaw...


I didn't have my normal round-the-neck knitting needles, so I borrowed some of Ken's, and ended up making the neck of the sweater incredibly, hilariously too-small.

This picture kind of reminds me of Thomas the Tank Engine.

Oh dear.

At the time I was feeling quite disillusioned with knitting and decided to just finish of the neck as it had been before making the neckband, making it look just slightly unfinished.

Or slightly more than slightly.

Dutch winters are quite mild, so he'll live.

If for whatever reason, you would like to recreate this sweater, this is the pattern I used. I found it very easy to follow for someone who had previously only knit hats and scarves. I do, however, recommend being a little careful in making the neckband. :P

"Pose seriously for me!"

Sunday, March 23, 2014

New Season of Kabloem Sneak-Peek


Hey all,

It's my spring break, and I've been hard at work on a new collection of Kabloem pieces (for those of you who don't know, Kabloem is my Etsy shop where I sell floral hair crowns, combs, and other accessories for weddings, proms, communions, etc). Side note: Since I'm on Spring Break, Kabloem is currently in 'vacation mode' and will officially re-open on March 31st.

I've been making so many pieces in recent weeks that I really wanted to share them, but since I won't be officially listing them until the 31st, I thought I'd share a sneak-peek here, on my craft blog. Here are a few upcoming pieces:

Fall wedding crown:

It's hardly Autumn, but after watching a particularly nostalgia-inducing episode of Parks and Rec, I was in the mood to put together an extravagant head wreathe for an Autumn wedding. This crown is thin and delicate along the edges, with an explosion of flowers and color on one side, which I thought would look lovely with a curled up-do.

Blue and purple "birthday" crown:

I was inspired to make this one by The Princess Bride, after the crown and color scheme of Buttercup in the final scene (of which it is surprisingly difficult to find a good picture):


Making a woodlands-inspired version of the crown proved to be a lengthy process, but I think it turned out rather well, and I like that this crown is very different in aesthetic to the rest of my shop, due in large part to the pearl- and berry-covered spires sticking out of it. Here you can also see that I use a collection of differently-colored ribbons, which is a new look I'm trying out.

 Magnolia wedding crown:


This creamy white crown is another example of the delicate crown with a large accent look that I've been trying out. I like the small leaves and swirling berries especially.

Pink butterfly crown:

Another full, rich crown that I thought would be nice for a big occasion.
Blue and purple ribbon crown:
 Something smaller that could be nice for Prom.

Clips, combs, and barrettes:


These are some of the smaller pieces I've been working on. The last picture shows several of the clips and barrettes I made using some lovely paper flowers I found at my local craft store.

This is far from the whole collection; I would say I have about 25 new items to list, when I get the chance (and find time to do proper photography). I'm thinking of doing a giveaway - which of these pieces do you like best? Do you have any suggestions for other items or color schemes I could make use of for the coming collection? Let me know in the comments!

Till next time,
Sara